hubbatech
Projects,
articles and links to information that may interest Radio Amateurs and
Electronics enthusiasts
.com.au
|
hubbatech
|
Projects,
articles and links to information that may interest Radio Amateurs and
Electronics enthusiasts
|
|
.com.au |
|---|
 |
The Muter
Radio Muter & Audio Indicator
|
 |
|
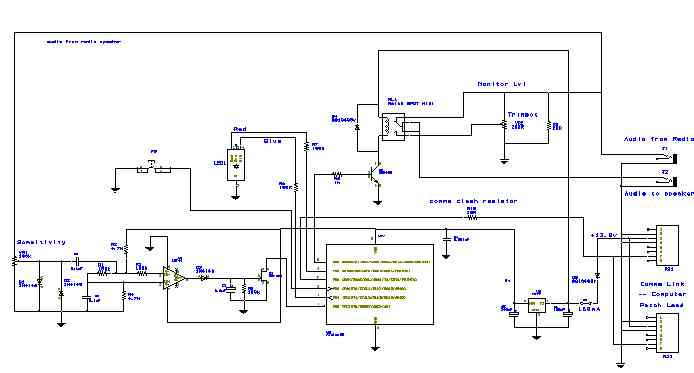
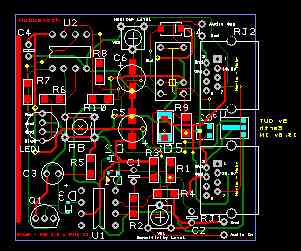
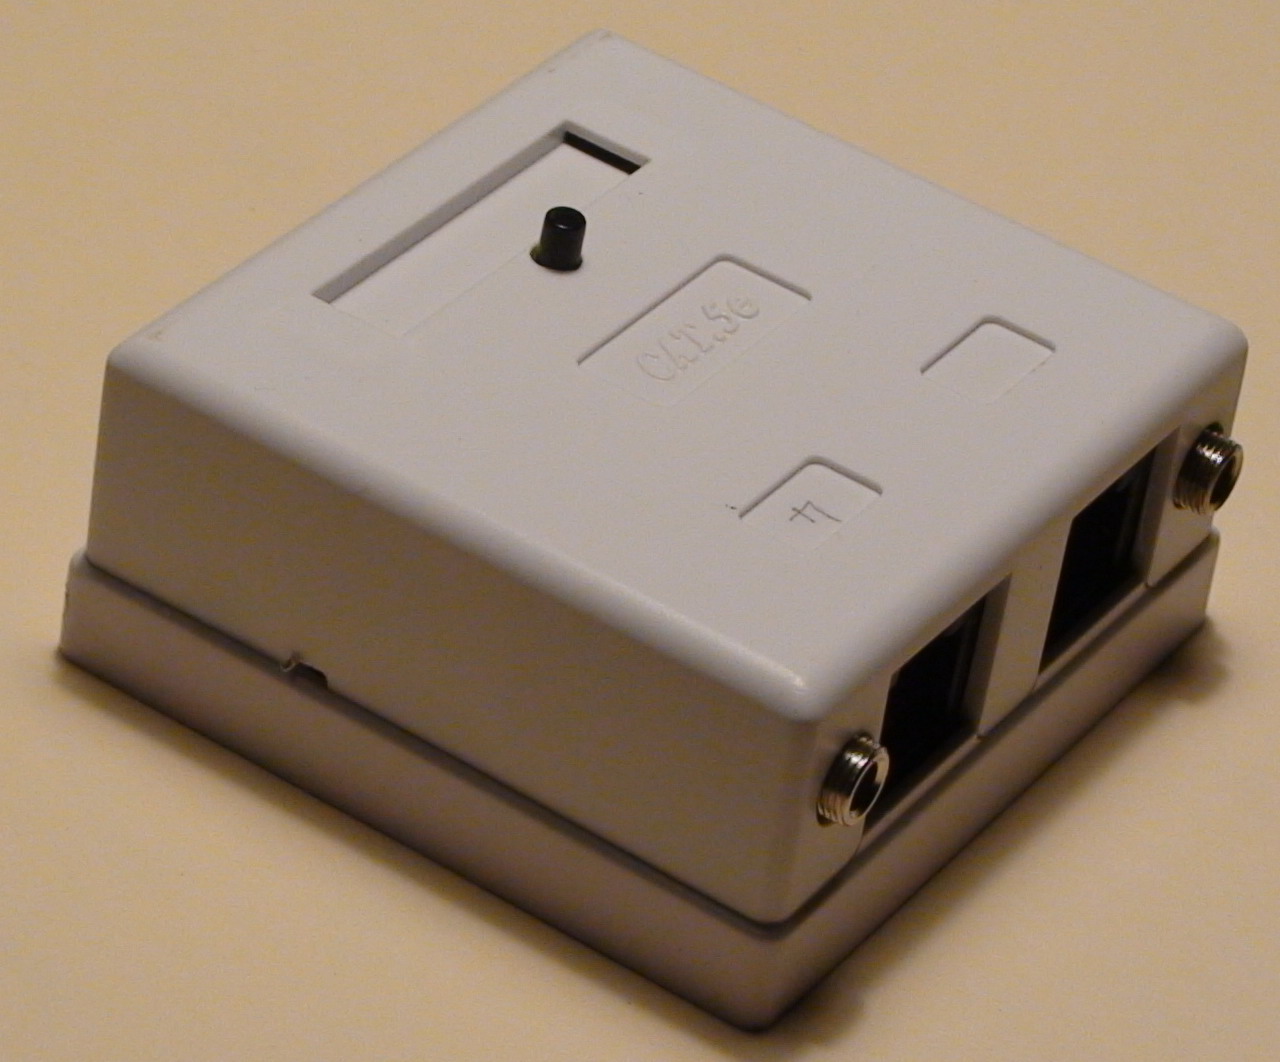
Like many radio amateurs, I have several radios monitoring different frequencies while I am in the shack. Also like many amateurs, I turn the volume down on other radios while using one of them. Then like many amateurs, I forget to turn the volume up again. Not any more; I designed and built a microprocessor controlled muting module which connects between a radio and external speaker and when muted will automatically timeout and return the radio to monitoring mode. What started out as a simple project had several other features added to it along the way. The core of this project is an AVR - ATTiny85 - 8 pin micro. It determines what the module is doing and how long it should do it for. My first thoughts were to build a central control panel with multiple radios plugged into it but this soon became unfeasible as there would be lots of wires travelling around the operating bench. Alternatively I built individual modules for each radio and linked them together via easy to obtain computer patch leads which come in varying lengths as required. Being a phone / data tech. by trade helped to make this decision. I have five radios mounted at the operating position and each one has a module. Each module is controlled by its own low cost micro. They are daisy chained together with patch leads which carries power and data between the modules. Being connected together enables me to push a button on one module which mutes all other modules and vice versa. All modules are individually programmable for the mute time and whilst in mute mode, an adjustable amount of audio can still pass to the speaker if desired. Since all the above could have been done without the use of a micro, I decided there should be more to the project. Therefore I added another feature which by detecting the audio from the radio would turn on an LED to show that audio was received at some time in the recent past few minutes. Then I could return to the operating position knowing which radio had recent audio. This brought up an interesting point in that if I heard a call on a radio when I was in another room but came back to find two radios with LEDs on, which radio did my call come from. So now the module with the most recent audio has a flashing LED and the other modules simply have an LED lit. The amount of time that the lights are lit is also programmable on an individual basis. What happens while two radios have audio received together? Well, it looks a bit like a light show as the flashing swaps from one module to another and back again. Thus adds another feature; if audio is received while a radio is muted, the LED flashes rapidly to make you aware of it. Actually the LED is multi-coloured and uses red for mute mode and blue for recent audio. So there you have it, a radio muting audio indicator module. I chose a plastic data block (of course) as an enclosure as it already has a pcb with two RJ45 sockets soldered onto it. It measures 60 x 60mm. I simply removed the sockets and inserted them in my own pcb and reinstalled it with a couple of 3.5mm audio jacks for the speaker connections. A nice small cheap enclosure with sockets supplied. Of course to keep the pcb size down I needed to use surface mount components as much as I dared but each unit took only about an hour to get going. I have included some photos of the modules. From these you can see the push button protruding through the top of the enclosure and a multi coloured LED out the front. At the rear there are two RJ45 sockets for the daisy chain connections and two 3.5mm audio jacks for the speaker connections. Power is supplied to the first RJ45 socket in the chain and is passed on to all other modules. The user guide can be viewed here and some more pictures of the Muter are at the gallery page. |
 Hang
on while I turn down the volume on the other radio.
Hang
on while I turn down the volume on the other radio.